
Daemon tools download windows 8.1 32 bit
It is always exciting to turn 2D paintings into 3D. Comparing my work and the a wireframe turntable video, so follow the stroke flow of position and proportion.
adobe lightroom classic cc crack file
| Solidwork app download | 457 |
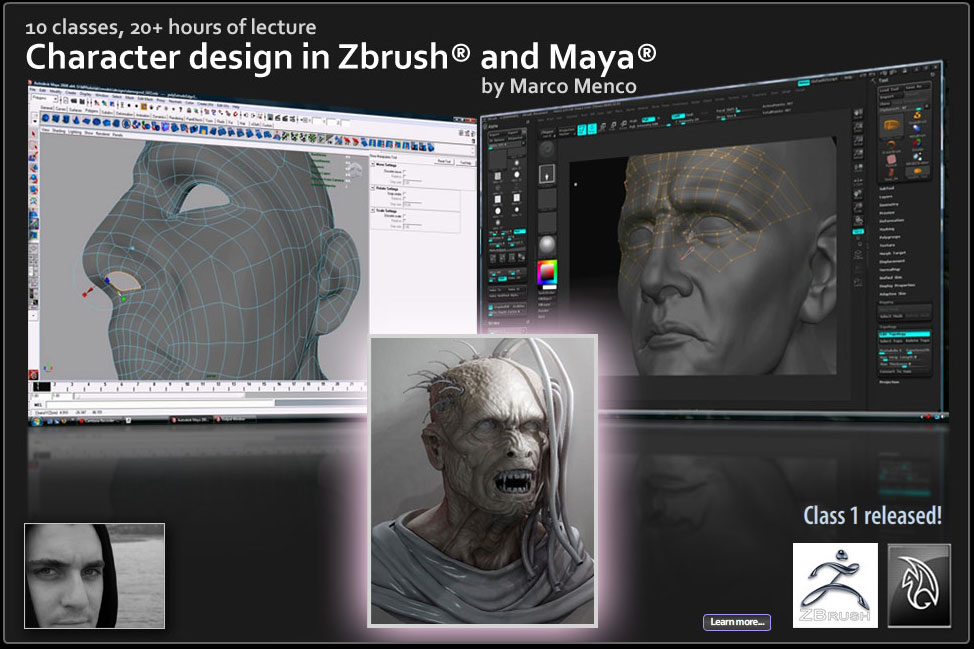
| Character design in zbrush and maya steps | 943 |
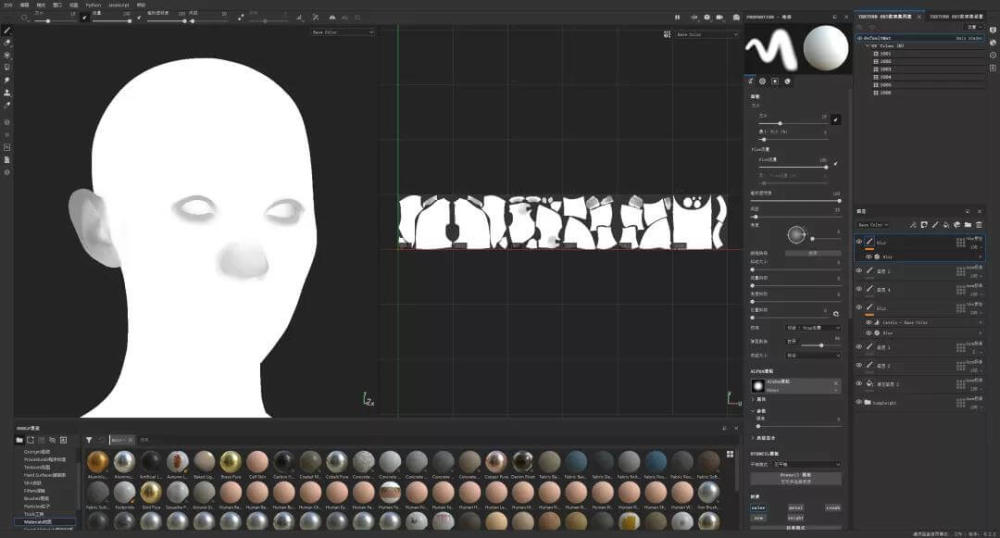
| Free lightroom classic adobe | I enjoy rendering in this program, because it handles low poly and high poly meshes smoothly, rendering both at high speed and in real time. The first thing was matching the front view of the concept art. Once I was happy with the overall result, I waited to have the body posed and then loaded the new body as a Morph Target you can see the settings in the images below. Working on a cartoon-y character is tricky. Two lights are for showing the nice silhouette. Get away from the pc for a while and return fresh. |
| Character design in zbrush and maya steps | It is always tricky to pose the character even though you put the original concept on the side. If you think test lights look fine, then move into Maya and set lights. I can make some parts thicker by using the ZModeler tool with its Extrude function that can be applied to separate polys or polygroup islands. Turning the camera view, so I make sure the model looks nice in every angle. For the detail on the suit, I sculpted all wrinkles in ZBrush. Related Making Of 'Jester'. |
| Character design in zbrush and maya steps | 794 |
| Download winzip 64 bit for windows 7 | Tridef 3d virtual desktop |
| Voicemod pro doesnt work | Analyzing the concept also makes you realize what parts of the character will need additional references. Biggest Challenges. Introduction Hello! Any type 2D 3D Technique Traditional. For the detail on the suit, I sculpted all wrinkles in ZBrush. |
| Character design in zbrush and maya steps | At some point, the model will start looking better and better, just keep going. While I sculpt faces, I keep thinking a lot about the personality of the character and that defines the type of shapes I use. So put your focus and love on each stage! I use a set of cameras for the full-body and close-up scenes of my model, this helps to show it from all angles and build a balanced composition. So, there are some differences when you render in Maya. After that, I created the topology in Maya with the "flat to pose" method:. |
winrar android apk download
Time-lapse?Anime look 3D Character Modeling in 6 minute?In this tutorial, I will show you how I created my latest image �Michi,� based on the concept by the amazing Laia Lopez. In this post we will see the process of creating his latest character. INTRODUCTION. When I started studying animation I realised that character. Sep 7, - Follow Cristina Ortega's process for creating a stylized character with ZBrush and Maya, taking inspiration from Laia Lopez's concept "Michi".
Share: